Image to Video AI: How to Turn Any Photo Into a Video (Free)
Turn any photo into a video with free AI — no skills needed. The one rule that matters most, the best model right now (SeeDance 2.0), and the exact prompt recipe.
The short version
Image-to-video AI takes a still photo and makes it move — your photo becomes the first frame, and the AI paints the next few seconds out of it. It's free to start, you need zero editing skills, and it all happens in your browser. Two things decide whether your clip looks real or looks like melting plastic: the image you start from and the words you describe the motion with. Get those right and almost any model gives you something good.
This is the beginner-friendly guide: what image-to-video actually is, the one rule that beats everything else (start from a realphoto — especially for faces), which model is best right now, and the exact recipe for a clip that doesn't look fake. You can try the free image-to-video tool while you read — it writes the hard part (the prompt) for you, no signup.
What “image to video” actually means (explained simply)
Imagine you hand an artist one photo and say “keep drawing what happens next.” They look at your photo, then draw the frame just after it, then the one after that — 24 little drawings for every second — until you have a few seconds of video. That's exactly what an image-to-video model does, except it does it in about a minute. It is notthe old trick of zooming and panning across a flat photo (that's a slideshow). The AI genuinely invents new motion: hair moves in the wind, the camera drifts, a person turns their head, a product spins.
Because every frame is built out of the one before it, the whole video is only ever as good as the photo you start from. Hand it a sharp, clear picture and it has plenty to hold onto. Hand it a blurry, dark, or fake-looking one and it starts guessing — and guessing is where you get warped faces and weird hands.
The one rule that beats everything: start from a real photo
If you remember nothing else, remember this. For anything with a face or a real person, start from a real photo of that person.Not an AI-generated portrait. Not an “AI avatar” you made of yourself. An actual photo, taken with a camera.
Here's why, in plain terms. Every time you let AI generatea face, a little bit of “you” gets lost — the AI keeps the vibe but quietly changes the details that make you recognisably you. Do it once (make an AI avatar) and you've already drifted. Then feed that avatar into a video model and it drifts again across every frame. That's two rounds of drop-off stacked on top of each other, and by the end the person in the clip is a stranger who kind of looks like you. Start from a real photo and the model has your true face locked in from frame one — one round of drift instead of two, and your likeness survives to the end.
The simple rule of thumb
People and faces → use a real photo.Backgrounds, environments, skies, stadiums, landscapes, sets → AI-generated is totally fine. Mix them: a real you, dropped into an AI-built world. The thing a viewer studies hardest is the face, so that's the part you never fake.
Let me show you exactly what I mean with my own face. The tempting move is to upload one selfie and ask AI to generate a clean “character sheet” of yourself from every angle — front, profile, three-quarter — so you have a tidy reference to animate. Here's what that looks like:
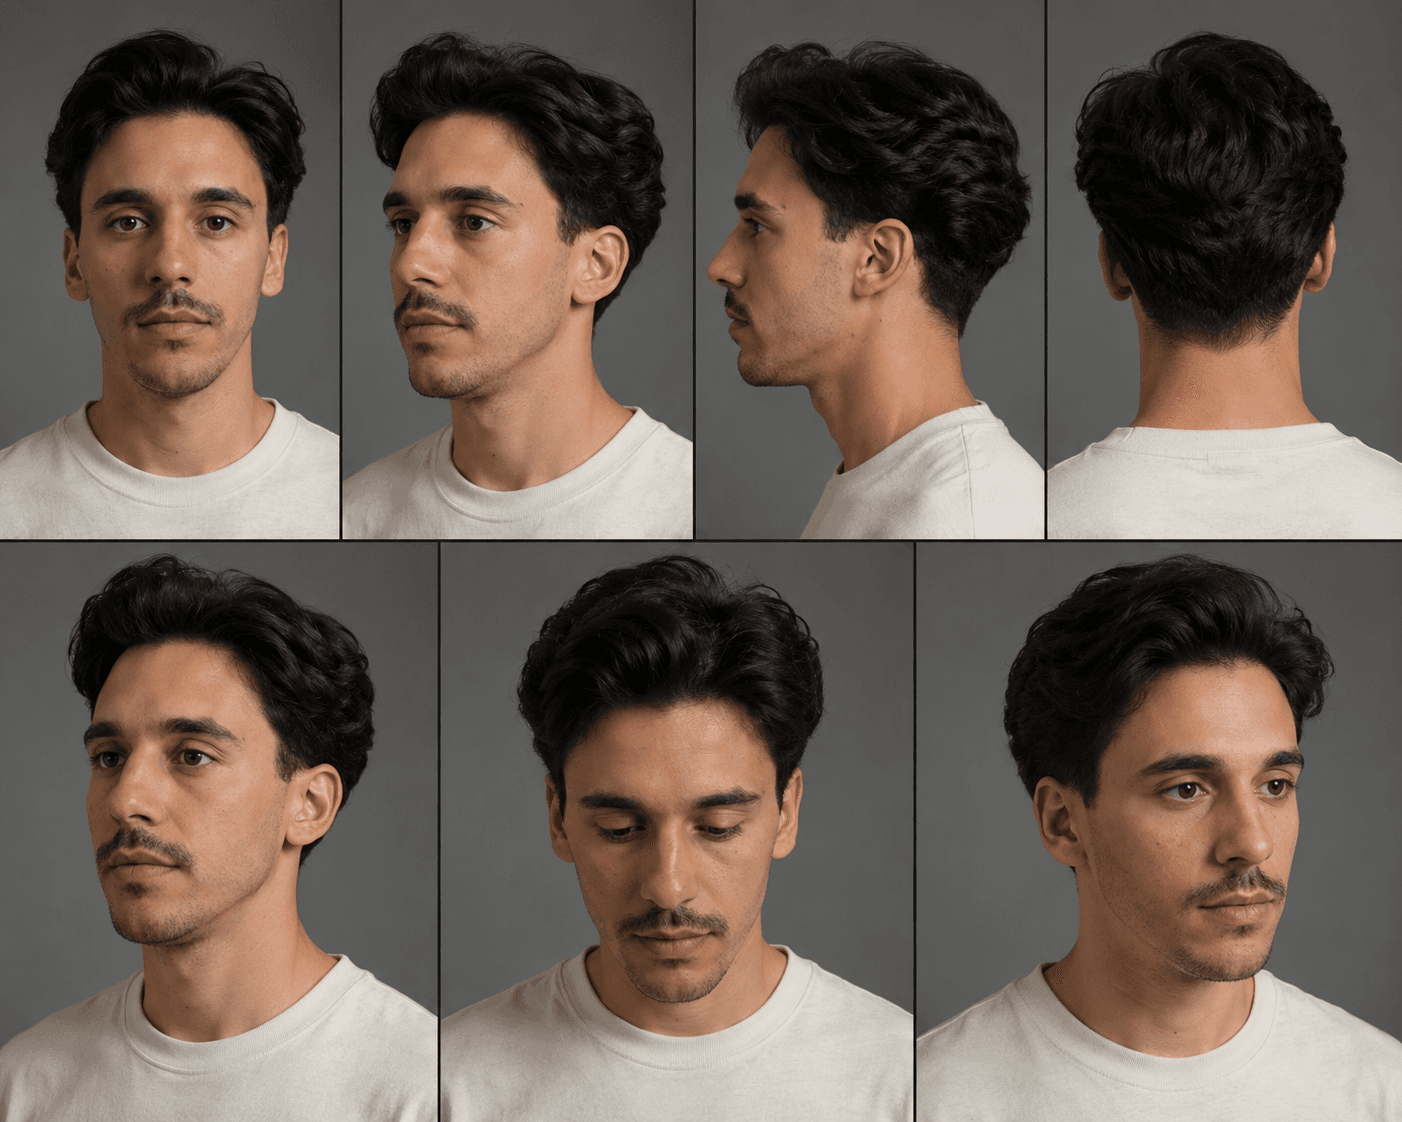
That drift is invisible until you animate it — and then it compounds. Below, the same idea rendered two ways. On the left, I started the video from a real photo of my face. On the right, I started from the AI avatar above. Same person, same scene, same model — but the avatar version has drifted into someone who only sort of looks like me.
So skip the AI-avatar step entirely. Don't upload your face, generate a character of it, and then animate that. Just upload the real photo of your face straight into the video model. One round of drift instead of two — and your likeness survives.
The 4 ingredients of a clip that doesn't look fake
A believable image-to-video clip is basically a recipe. Get these four right and you're 90% there, in any tool:
1. A strong starting image
Sharp, well-lit, the subject clearly visible. High resolution gives the AI more real detail to keep. For people, a real photo (see the rule above). For products, the clean listing photo, not a watermarked supplier collage.
2. A motion prompt, not a wish
Don't type 'make it move'. Say what moves and how the camera moves: 'gentle wind in her hair, slow camera push-in, she turns to look at the lens.' Specific beats vague every single time.
3. A short duration
Keep it to 4–6 seconds. That's long enough to show one moment and short enough that the AI doesn't have time to drift or melt. Want longer? Make two clips and join them, or use the 'extend' button some tools have.
4. A negative prompt
The list of things the AI must NOT do — 'no extra fingers, no plastic skin, no warped face, no beauty filter.' Boring, skipped by most people, and the single biggest upgrade to realism. Banning the AI tells does more than any pretty description.
Writing all that by hand from a blank page is the annoying part — which is the whole reason the free image-to-video generator exists. You upload your photo, describe the motion in one line, and it writes the full structured prompt (camera, lighting, motion, negative prompt) for you, plus a clean reference frame to attach.
Which AI model is best right now?
Short answer: SeeDance 2.0 is the best image-to-video model right now.I run the same shot through all of them constantly, and SeeDance holds a face and a scene together more reliably than Kling, Veo, Grok, or Midjourney — fewer melting hands, less identity drift, more “wait, is that real?” on the first try. Here's the honest rundown:
| Model | Best at | Watch out for |
|---|---|---|
| SeeDance 2.0 | Overall realism, holding a face + scene together — my pick | Newer, so fewer tutorials around |
| Kling 3.0 | Strong human motion, UGC-style clips | Hands and identity can still drift on longer shots |
| Veo 3.1 | Cinematic, lifestyle realism, built-in audio | Pricier; more 'movie' than 'phone' by default |
| Grok | Free right now, multi-image, auto sound | Physics gets weird; quality is hit-or-miss |
| Midjourney | Beautiful, stylised, artistic motion | Lower resolution; less control over a real face |
One catch: most of these are sold separately, and at any real volume the standalone subscriptions run $20–$40+/month each. The way I actually use SeeDance 2.0 is inside Creative Fabrica's Studio AI: the front-end is genuinely the nicest to use, it bundles several models so you can A/B them side by side, there's a free tier, and it's cheap — a fraction of paying for each model on its own. In my own tests the SeeDance output through Studio AI came out cleaner than what I got from Kling, Veo, Grok, and Midjourney for the same prompt. So that's my recommendation: write the prompt with the tool, render it on SeeDance 2.0 in Studio AI.
The motion-prompt formula, in plain English
Almost every tutorial admits “the prompt is everything” and then never teaches it. Here's the whole formula. Fill in four blanks:
[ what the subject does ] + [ how the camera moves ] + [ where / the scene ] + [ the style ]

Example:
"She smiles and tilts her head slightly, slow camera push-in,
 golden-hour light through a window behind her, soft cinematic, shot on a phone."

Then add a negative prompt:
"no extra fingers, no warped face, no plastic skin, no beauty filter,
 no identity change, no jitter."
Two pro moves on top of that. Subtle wins: for a portrait, ask for a small motion (a blink, hair drifting), not a backflip — gentle motion almost never breaks. And use a start and end frame if your tool supports it: give it the first picture and a slightly different last picture, and the AI smoothly fills the gap instead of inventing random motion. That one trick kills most of the jitter people complain about.
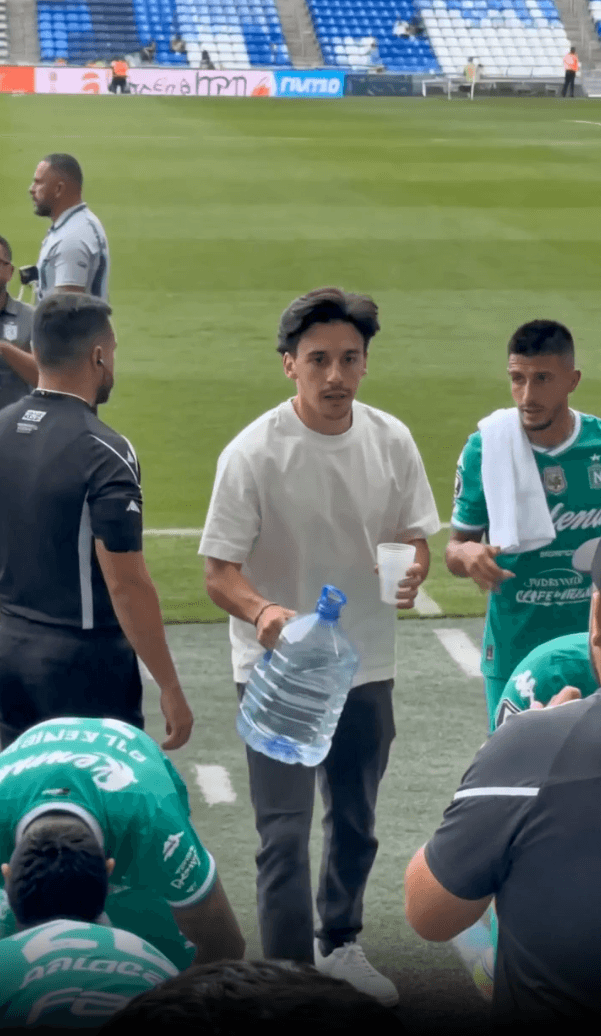
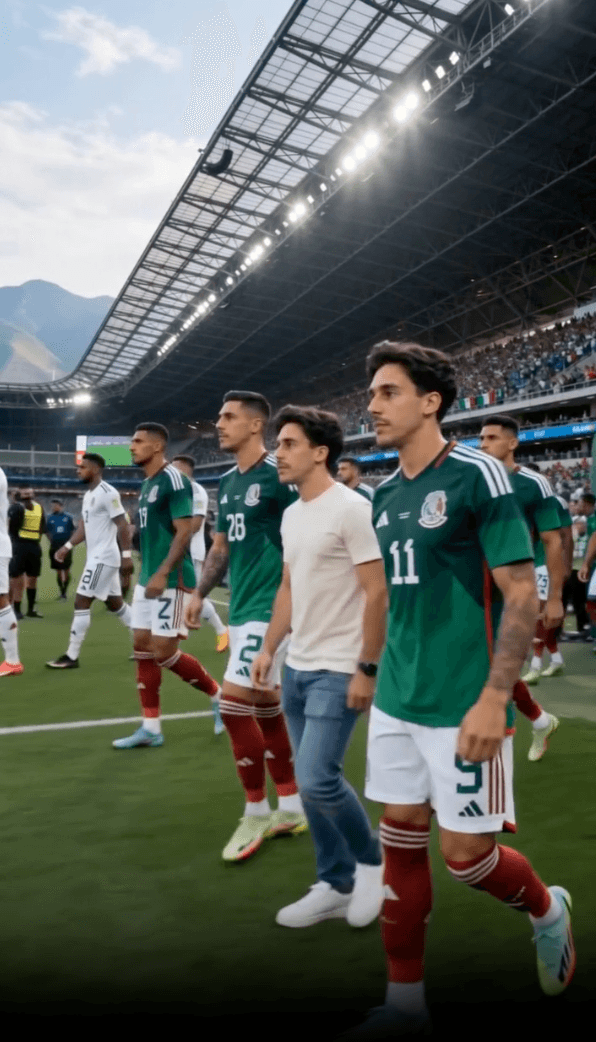
A real example: putting your own face in a stadium
Here's the “real face + AI world” rule in action. I built a free World Cup video generator that puts you in the stands of a 2026 World Cup match. It follows the exact rule from this post: you upload one real selfie (your face, never an avatar), and the tool supplies a real photo of the stadiumas the backdrop. Two real anchors — your face and the venue — and the model wraps a believable clip around them. That's why my friends genuinely thought I'd flown out to the game.
Want the deep dive on that one? It's in I made an AI video of myself at the World Cup. The same recipe works for product clips too — see turning product photos into video.
Why your AI video looks fake (and the quick fixes)
You started from an AI face
The number-one cause of 'that's not me anymore'. Swap the AI avatar for a real selfie and the drift mostly disappears. Real photo for the person, every time.
Your starting image was low quality
Blurry, dark, or tiny inputs 'melt' because the AI has to invent detail it can't see. Use the sharpest, best-lit, highest-resolution version you have.
Your prompt was one vague line
'Make it move' gives generic slop in any model. Use the four-blank formula above and watch the same model produce something completely different.
You only generated one take
AI video is a slot machine — cheap to pull again. Generate two or three, nudge one line of the prompt or re-roll the seed, and keep the best. The pros aren't lucky; they just re-roll.
How to turn a photo into a video, step by step
- Pick your starting photo. Sharp and well-lit. For a person, a real photo — not an AI avatar. For a product, the clean listing shot.
- Write the motion in one line. What the subject does + how the camera moves. Or let the free image-to-video tool turn your one line into the full structured prompt with a negative prompt baked in.
- Render it on SeeDance 2.0. Paste the prompt into Studio AI, attach your reference image, set 9:16 for TikTok/Reels, and generate a ~5-second clip.
- Generate two or three and keep the best. Re-roll or tweak one line. Keep the take where the face and the scene hold together the whole way through.
- Download and post.Vertical for TikTok, Reels, and Shorts. If your free render has a watermark, that's the tool's free tier — Studio AI's paid tier is cheap and clean.
The whole game is two things: a real starting image (especially for faces) and a detailed motion prompt. Nail those, render on SeeDance 2.0, re-roll a couple of times — and a free photo on your phone turns into a video people can't tell from the real thing.
Frequently asked questions
What is the best free image to video AI?
For overall realism, SeeDance 2.0 is the best image-to-video model right now — it holds a face and a scene together more reliably than Kling, Veo, Grok, or Midjourney. The cheapest way to use it is inside Creative Fabrica's Studio AI, which has a free tier, a clean interface, and bundles several models. Pair it with a free prompt generator that writes the structured prompt for you.
How do I turn a photo into a video for free?
Pick a sharp, well-lit photo, describe the motion in one line (what the subject does and how the camera moves), and render it in a free image-to-video model. Our free tool writes the full structured prompt and a reference frame for you in about 30 seconds with no signup; you then generate the clip in Studio AI, Kling, Veo, or Runway. Keep clips to 4–6 seconds and re-roll a couple of times.
Why does the face change in my AI video?
Almost always because you started from an AI-generated face. Every time AI generates a face it drifts a little; making an AI avatar and then animating it stacks two rounds of drift, so the person ends up looking like a stranger. Start from a real photo of the person instead — the model locks your true likeness from the first frame and it survives to the end.
Can I use an AI-generated image for the background?
Yes. The rule is: real photo for people and faces, AI-generated is fine for backgrounds, environments, skies, stadiums, and sets. Viewers study faces hardest, so that's the part you never fake — but the world around them can be fully AI-generated. The World Cup tool does exactly this: your real selfie dropped into a real stadium photo.
How long should an AI image-to-video clip be?
Keep it to 4–6 seconds. That's long enough to show one moment and short enough that the model doesn't have time to drift or melt, which is where today's AI video looks cleanest. For something longer, render two clips and join them, or use an 'extend' feature if your tool has one.
Do free image to video tools add a watermark?
Many do, along with credit limits or daily caps — that's the trade-off for 'free'. Our prompt generator is free with no signup and no watermark on the prompt itself. When you render the video, Studio AI has a free tier and a cheap paid tier (from a few euros a month) that removes the watermark and gives you higher resolution.